Best Solar Panel for a Van or Truck Build
The Renogy 200W 12V monocrystalline panel at $152.99 is the best solar panel for most van builds. At 5 peak sun hours with a 0.75 system derate it returns roughly 750 watt-hours a day, about 59 amp-hours at 12.8V, which covers a 12V fridge plus lights on one panel and one pair of roof penetrations.
Solar is the only charging source in a vehicle build that works while the vehicle is parked, and that single property is why it is worth mounting. For most vans, trucks and camper roofs the right unit is the Renogy 200W 12V panel at $152.99, because it delivers roughly 750 watt-hours on a clear day for one set of brackets and one roof penetration, and because 200W is the panel size most roofs can fit two or three of without a compromise.
A solar panel is a current source whose output rises and falls with the light hitting it, not a battery charger. It produces roughly its rated wattage only in full perpendicular sun at a cell temperature no roof ever sees. Everything useful about sizing an array comes from accepting that gap up front and derating for it honestly.
Best 12V solar panels by build stage

Renogy 100W 12V Monocrystalline Solar Panel (N-Type, 16BB)
The reference panel of the whole category and the cheapest honest way to add roof solar. One of these flat-mounted returns roughly 25 to 35 amp-hours a day in good summer sun, which is about one fridge.
Best for: A first roof panel, or filling an awkward roof gap
Check price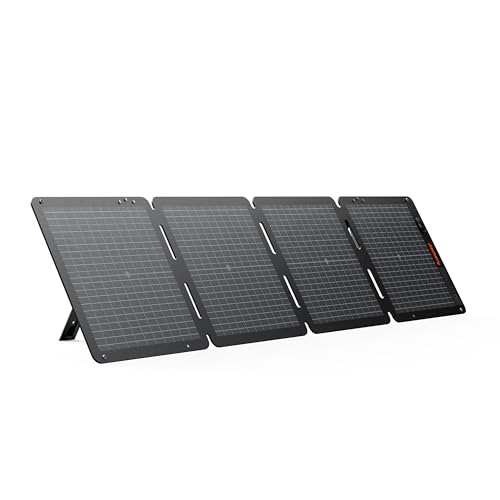
Jackery SolarSaga 100W Air Bifacial Portable Panel
A folding panel you aim at the sun rather than a fixed one you park under a tree. Portable panels out-produce flat roof panels by a wide margin precisely because they can be tilted and moved.
Best for: Renters, rooftop tents, and anyone who parks in shade
Check price
Renogy 200W 12V Solar Panel (N-Type, 16BB)
Twice the output on roughly the same mounting effort as a 100W panel, and fewer roof penetrations per watt. On most van and truck-camper roofs this is the sensible unit size.
Best for: The standard building block of a 200W to 600W roof array
Check price
BougeRV 200W 12V Bifacial Solar Panel (N-Type, 16BB)
Bifacial cells pick up reflected light off the roof surface, which is a real if modest gain on a white or light-coloured vehicle. Treat the rear-side bonus as a few percent, not the marketing figure.
Best for: Light-coloured roofs with an air gap under the panel
Check price
EcoFlow 220W Bifacial Portable Solar Panel (IP68)
The portable panel that pairs directly with an EcoFlow station without an adapter hunt. IP68 rating means it survives being left out through weather, which is how these actually get used.
Best for: Power station owners who want one clean cable
Check price
Renogy 400W 12V RV Solar Kit (4x100W, 30A PWM Controller)
A complete array with brackets, cables and connectors, which removes the part of a solar install that trips people up. Note the bundled controller is PWM: budget for an MPPT upgrade at this array size.
Best for: A full roof array bought as one part number
Check priceGoal Zero Boulder Briefcase Solar Panels
Goal Zero sells most of its solar direct and through outdoor retailers rather than through a consistent Amazon listing, so this link opens a scoped search rather than a specific product page.
Best for: Goal Zero Yeti owners staying inside one ecosystem
Find on AmazonPrices change often, confirm on Amazon. Products without a direct listing sell mainly through dealers, so those links open a scoped Amazon search. As an Amazon Associate we earn from qualifying purchases.
How much power does a solar panel actually make on a roof?
The working formula is: daily watt-hours equals panel watts multiplied by peak sun hours multiplied by a system derate. Use 0.75 for a flat roof-mounted array through an MPPT controller and 0.6 if you are still on PWM. Peak sun hours are not daylight hours; they are the equivalent number of hours of full 1000 watt per square metre irradiance, and for most of the continental US they run between 4 and 6 in summer and 2 to 4 in winter.
Run a 200W panel through it: 200 multiplied by 5 multiplied by 0.75 gives 750 watt-hours, which at 12.8V nominal is about 59 amp-hours. That is the whole daily draw of a 45 quart fridge plus lights, on one panel, on a good day. It is also the number that collapses when you park in trees, when the panel lies flat in winter, or when a rooftop tent throws a shadow across one corner at four in the afternoon.
Shading deserves a paragraph of its own, because it does not behave proportionally. Cells in a panel are wired in series, so a shadow across one cell can drag down the whole string rather than costing you the fraction of area it covers. Bypass diodes limit the damage to a section, not to a cell. This is the reason a smaller unshaded array frequently outproduces a larger partly shaded one, and the reason panel placement is worth more thought than panel brand. Check your own location against the sun hours by region chart before you decide how much roof you need to cover.
| Panel | Watts | Price | Per watt | Wh per day | Ah at 12.8V |
|---|---|---|---|---|---|
| Renogy 100W monocrystalline | 100 | $74.79 | $0.75 | 375 | 29 |
| Jackery SolarSaga 100W Air | 100 | $249.00 | $2.49 | 375 | 29 |
| Renogy 200W N-Type | 200 | $152.99 | $0.76 | 750 | 59 |
| BougeRV 200W bifacial | 200 | $199.99 | $1.00 | 750 | 59 |
| EcoFlow 220W bifacial portable | 220 | $298.99 | $1.36 | 825 | 64 |
| Renogy 400W kit with PWM | 400 | see listing | see listing | 1,200 | 94 |
| Goal Zero Boulder Briefcase | varies | sold direct | sold direct | varies | varies |
Watt-hours assume 5 peak sun hours and a 0.75 derate through an MPPT controller, except the Renogy 400W kit, which is calculated at 0.6 because it ships with a PWM controller. Portable panels beat these figures when tilted toward the sun and fall below them when left flat. Goal Zero sells most of its solar direct and through outdoor retailers rather than a consistent Amazon listing, so that entry opens a scoped search rather than a fixed price.
Which solar panel should most van builds buy?
The Renogy 200W N-Type panel at $152.99, for a reason that has nothing to do with cell technology. At roughly $0.76 per watt it is priced the same per watt as the 100W panel, so the larger unit is free efficiency in installation terms: half the brackets, half the MC4 joints, half the sealant, and one hole in the roof instead of two. Every one of those is a future leak or a future loose connection you did not create.
N-Type cells with 16 busbars are a genuine if modest improvement over older P-Type panels. The practical benefit is a lower temperature coefficient, meaning the panel loses less output as it heats up, and roof-mounted panels in summer get very hot. Do not buy on that spec alone. Buy on the fact that this is the reference unit of the category, stocked everywhere, with a bracket and connector ecosystem that assumes it exists.
The BougeRV 200W bifacial panel at $199.99 is the alternative if your roof is white or light coloured and you can mount with a real air gap underneath. Treat the rear-side gain as a few percent rather than the headline figure, and treat the air gap itself as the more valuable half of that decision: a panel bonded flat to a hot roof runs hotter and produces less regardless of what its back side can see.
Do you need a portable panel as well as a fixed array?
Often, yes, and it is the upgrade people are slowest to make. A fixed panel produces whenever the vehicle sits in sun, with zero setup, which is exactly the behaviour you want on a driving day. It also produces nothing useful on the days you deliberately park in shade because it is 95F outside, which is precisely when a fridge is drawing the most.
The Jackery SolarSaga 100W Air at $249 is a folding panel you aim rather than a fixed one you park under a tree. At $2.49 per watt it looks absurd next to a $0.76 roof panel, and that comparison is misleading, because a tilted panel in full sun beats a flat panel in dappled shade by a factor that is nowhere near the price ratio. The EcoFlow 220W bifacial portable at $298.99 does the same job at greater scale and, with an IP68 rating, survives being left out through weather, which is how these actually get used.
The honest summary is that a fixed array is a capacity decision and a portable panel is an insurance policy against your campsite. If your budget only stretches to one, fit the roof panel first, because it produces on every single day without a decision from you.
What does the expert tier get you, and what does it cost?
The Renogy 400W 12V RV solar kit is four 100W panels with brackets, cables and connectors in one part number, which removes the part of a solar install that trips people up: working out which connectors, which cable gauge and which brackets go together. For a first roof array that packaging is worth real money in avoided mistakes and avoided second orders.
One caveat carries the whole recommendation. The bundled controller is PWM, not MPPT, and at 400W that is the wrong controller. A PWM unit clamps the panel to battery voltage and throws away the difference, which is why the derate figure drops from 0.75 to 0.6, costing you roughly 300 watt-hours a day on this array. Budget for an MPPT upgrade such as the Victron SmartSolar 100/30 at $111.76 and treat the bundled controller as a spare. The MPPT versus PWM comparison shows where that 20 to 30 percent actually comes from.
The Goal Zero Boulder briefcase panels stay on this list for one buyer only: someone already inside the Goal Zero Yeti ecosystem who wants connectors that mate without adapters. Goal Zero sells most of its solar direct and through outdoor retailers rather than a consistent Amazon listing, so that link opens a scoped search rather than pointing at a specific product page. That is the honest output, not a defect.
How do you wire and mount an array without creating a leak?
Three things decide whether a roof array is a five year installation or a five month one: the penetration, the bracket, and the cable. Get the penetration right and the rest is maintenance.
For the cable, 10 AWG tinned PV cable is the default. The voltage drop arithmetic is Vdrop equals 2 multiplied by one-way run length in feet, multiplied by current in amps, multiplied by 0.000999 ohms per foot for 10 AWG. The factor of two is there because current goes out and comes back, and forgetting it is the single most common sizing error in DIY builds. On a 12V system the 3 percent target is 0.36V, and a panel feed is a critical circuit, so it gets the 3 percent target rather than the 10 percent lighting allowance.
For the mount, Renogy Z brackets at $23.35 are the standard flat-mount solution and the cheap way to get the air gap that keeps the panel cool. For the penetration, use a proper cable entry gland box at $9.99 bedded in sealant rather than a grommet and hope. Ten dollars against a headliner full of water is not a close call. Full step by step in the how to install solar on a van guide and the solar panel mounting guide.
Who should not buy the expert tier?
Do not buy a 400W kit if your measured daily consumption is under about 40 amp-hours. Two hundred watts already returns roughly 59 amp-hours a day in decent sun, so a 400W array on a small load spends most of the day in float doing nothing while the extra panels take up roof space a fan or a rack wanted. Solar you never harvest is roof weight, not capacity.
Do not buy a large fixed array if you drive most days. A DC-DC charger at 50A puts roughly 600 watts into the bank the whole time the engine runs, which refills a 100Ah battery in about two hours of driving. Someone who covers ground daily gets more useful charge from the alternator than from any roof they can fit, and the correct array in that build is small and supplementary rather than large and central.
And do not buy a bundled kit at all if you already own a good MPPT controller. You are paying for a PWM unit you will not use, and buying panels, brackets and cable separately is cheaper once you know which parts you need. Size the whole array first with the solar array calculator, then buy to that number rather than to a kit's packaging.
What do people get wrong when buying panels?
- Sizing the array before measuring the load. Every useful solar decision starts from amp-hours consumed per day, not from how much roof is empty.
- Buying panels the controller cannot take. Check the maximum PV voltage and the charge current ceiling against the finished array, not the first panel.
- Mounting flat to the roof with no air gap. Hot cells produce less, and the gap costs nothing but bracket height.
- Ignoring shade from the fan, the rack and the tent. A shadow on one cell can drag a whole string, so lay the array out around the obstructions you already own.
- Using automotive wire on the roof. PV cable is UV rated and tinned for a reason; ordinary primary wire goes brittle and green.
- Skipping spare MC4 connectors. The first two you crimp are practice, and a bad connector on a roof is a fault you diagnose in the rain.
Frequently asked questions
How many solar panels do I need for a van?
Work backwards from the load. A 200W panel returns roughly 750 watt-hours on a clear day at 5 peak sun hours with a 0.75 system derate, which is about 59 amp-hours at 12.8V. A fridge, lights and device charging usually total 50 to 70 amp-hours a day, so 200W covers a careful build and 400W covers a comfortable one with margin for cloud and short winter days.
Is a 200W panel really twice as good as a 100W panel?
In output, yes, almost exactly. In installed cost, better than twice, because a 200W panel needs one set of brackets, one pair of roof penetrations and one cable run instead of two. The reason to fit two 100W panels instead is roof shape: awkward gaps around a fan, a rack or a vent often take two small rectangles where one large one will not sit flat.
Do bifacial solar panels actually produce more on a vehicle roof?
A little, and far less than the marketing suggests. Bifacial cells collect light reflected onto the rear of the panel, so the gain depends entirely on what is under it. A white roof with a genuine air gap under the panel might return a few percent. A panel bonded flat to a dark roof returns nothing at all from the rear and runs hotter, which loses more than the bifacial gain wins.
Should I mount panels flat or buy a portable one?
Flat roof panels produce whenever the vehicle is in the sun, with no setup and nothing to steal. Portable panels can be tilted and moved into a sunny patch while the vehicle sits in shade, which routinely doubles real output on a wooded campsite. Most well sorted builds end up with both: a fixed array that quietly tops up all day, and one folding panel for the days you park under trees.
What size wire do I need from the roof to the charge controller?
10 AWG solar cable handles a typical 12V array run and keeps voltage drop under three percent on most roof-to-cabinet distances. The arithmetic is Vdrop equals 2 multiplied by run length in feet, multiplied by current, multiplied by 0.000999 ohms per foot for 10 AWG. The factor of two exists because current flows out and back, and forgetting it is the most common sizing error in DIY builds.
Can I add more panels to an array later?
Yes, if you size the charge controller for the finished array rather than the first panel. Adding panels in parallel raises current and can exceed the controller rating, while adding them in series raises voltage and can exceed the maximum PV input. Buying a controller with headroom costs perhaps forty dollars now and saves replacing the whole unit when the array grows.
How we choose: we compare published manufacturer specifications, standards documents including ABYC E-11, and verified owner reviews. We do not test gear in person. Vehicle payload, roof load and charging limits vary by model and year, so confirm yours against the door jamb sticker and the owner's manual rather than any number published here.
Totalling your own build weight against your payload? The Overland Build & Power Planner is the paid version of these pages: 8 printable worksheets you fill in with your own numbers, plus the full PDF, $29.