Best Overland Recovery Gear: Boards, Ropes and Winches
The MAXTRAX MKII traction boards at $267.08 are the best recovery gear buy for most overlanders because they are the only item that gets a solo vehicle unstuck. Before spending anything, air down: a deflator that removes the valve core takes a tyre from 35 to 18 psi in under a minute and does more for traction in sand and on rock than any hardware you can bolt on.
The best recovery gear for most overlanders is a set of MAXTRAX MKII boards at $267.08, because they are the only item on this page that gets you out when there is nobody else on the track. But the honest answer to the question is that the first thing you should do costs nothing at all. Airing down does more for traction in sand and on rock than any piece of hardware you can bolt to the vehicle, and most of the recoveries that gear gets used for would never have started if the tyres had been at the right pressure.
Vehicle recovery is the process of restoring traction or applying an external force to move a vehicle that can no longer move itself. That definition matters because it splits the category cleanly in two. Restoring traction is what airing down and traction boards do, and it is cheap, quiet and safe. Applying external force is what straps, ropes and winches do, and every one of those puts thousands of pounds of stored energy into a line with people standing near it. The first half of the category is where the value is. The second half is where the danger is.
Recovery gear by build stage

VEVOR 7/8 in x 30 ft Kinetic Recovery Rope (30,580 lb)
A kinetic rope stretches and releases, so a second vehicle can recover you with momentum instead of a violent jerk. Match the rope rating to your vehicle weight, not to the biggest number available.
Best for: The first recovery item to buy, if you travel with others
Check price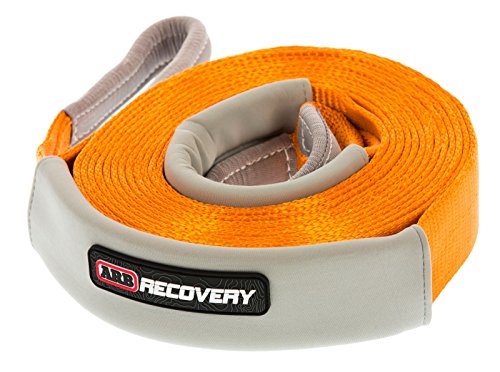
ARB705LB Recovery Snatch Strap 30 ft (17,600 lb)
NATA approved with a stated 20% stretch, which means the elongation figure is tested rather than claimed. Never attach a snatch strap to a tow ball: that is the single most common cause of recovery injuries.
Best for: A tested strap with a documented rating
Check price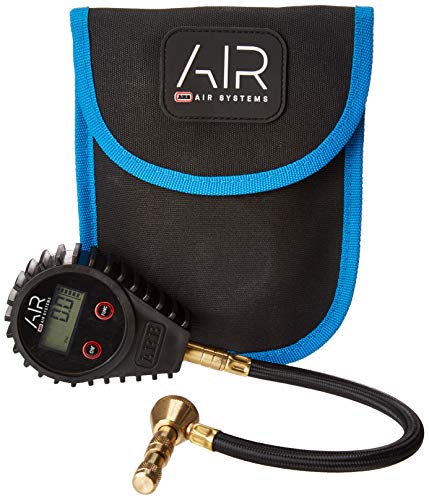
ARB510 E-Z Digital Tire Deflator and Pressure Gauge
Airing down does more for traction in sand and on rock than any single piece of hardware, and it is free. A deflator that removes the valve core takes a tyre from 35 to 18 psi in well under a minute.
Best for: The highest-value recovery tool per dollar
Check price
MAXTRAX MKII Vehicle Recovery Boards
The boards everything else is compared against, with teeth that grip the tyre rather than shear off on the first attempt. They also make a self-recovery possible when you are travelling alone.
Best for: Solo travel in sand, mud and snow
Check price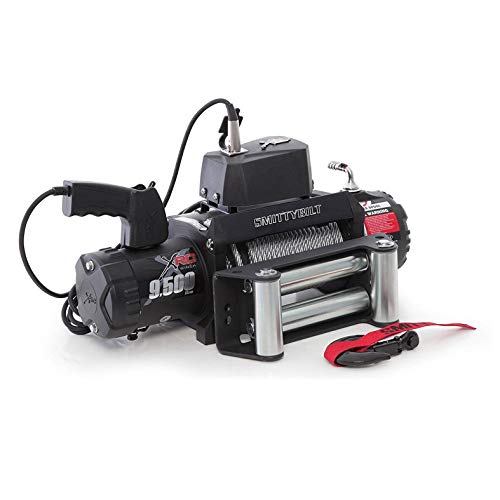
Smittybilt XRC Gen 2 9500 lb Winch with Steel Cable
A winch should be rated at roughly 1.5 times your vehicle’s gross weight, which puts most mid-size 4x4s at 9500 lb. It also needs a bumper rated to take the load, which is often the larger expense.
Best for: Vehicles with a winch-capable bumper already fitted
Check price
ARB CKBLTP12 12V Brushless Twin Motor Portable Air Compressor
Airing back up is the tedious half of airing down, and a twin motor compressor turns twenty minutes into five. It is also the most expensive way to solve a problem a $60 compressor solves slowly.
Best for: Groups, and anyone airing down every trip
Check pricePrices change often, confirm on Amazon. Products without a direct listing sell mainly through dealers, so those links open a scoped Amazon search. As an Amazon Associate we earn from qualifying purchases.
What order should you actually buy recovery gear in?
Not the order the prices suggest, and not the order the marketing suggests. The order that matches how often each item saves you, based on researched practice and verified owner reviews across the category, looks like this.
First, a way to air down and a way to air back up. It is free traction. An ARB510 E-Z digital deflator at $82.00 removes the valve core so the air leaves the tyre as fast as it physically can, taking a tyre from 35 to 18 psi in well under a minute, with a gauge on the same tool so you stop where you meant to. The cheap alternative is a screw-on deflator and a pencil gauge, which works and takes three or four times as long. What you cannot skip is the compressor at the other end of the day, because a tyre at 18 psi is not roadworthy.
Second, traction boards. They are the only item in the whole category that works when you are alone, and being alone is the situation that actually turns a stuck vehicle into a serious problem. They are also light for what they do, at 15 to 20 lb a pair, and they have no stored energy, no rating to exceed and no way to hurt anybody standing nearby.
Third, a rated strap or kinetic rope, but only if you travel with others. A 30,580 lb rope is useless without a second vehicle and a rated point to attach to. Plenty of people buy the rope first because it is the cheapest item on the shelf, then discover on the day that they are solo and it is dead weight. Buy it when your travel pattern justifies it.
Fourth, a compressor. Any compressor that can inflate four 33 inch tyres from 18 to 35 psi is a compressor that works. The difference between a $60 unit and a $1,379.95 unit is how long you stand there.
Fifth, and only fifth, a winch, and only if the bumper is rated for it. A winch on an unrated bumper is not a recovery tool, it is a way to tear the front of a vehicle apart under load. The bumper is frequently the larger expense, and it arrives with 100 lb or more of steel hanging ahead of the front axle.
How much does airing down really help?
Airing down is deliberately lowering tyre pressure so the contact patch lengthens, spreading the vehicle weight over more ground. A tyre at 35 psi has a short, stiff footprint that concentrates load and digs. The same tyre at 18 psi has a footprint that can be half again as long, which floats over sand instead of trenching into it, and which lets the tread wrap around rock rather than skate off it. It also softens the ride enormously on corrugations, which matters for the vehicle and for everything bolted to it.
| Surface | Starting pressure, psi | Why |
|---|---|---|
| Highway and pavement | 32 to 38 | Whatever the door jamb placard says for your load. Nothing below this belongs at highway speed. |
| Gravel and graded dirt | 28 to 32 | A few pounds off takes the harshness out of corrugations and reduces stone chipping on the sidewall. |
| Snow and mud | 18 to 25 | A longer footprint helps in soft snow. In deep mud a narrower, higher pressure tyre sometimes digs to firmer ground instead, so this one is situational. |
| Sand | 15 to 20 | The single biggest traction gain available for free. The footprint lengthens dramatically and the tyre floats instead of digging. |
| Rock crawl, walking pace | 12 to 18 | The tyre wraps the rock rather than bouncing off it. Only at very low speed, and only with an air source to recover afterwards. |
Read these as starting points, not settings. Airing down increases sidewall vulnerability to cuts and punctures, and it raises the risk of unseating a tyre from the rim in a hard turn, which is called debeading. You must air back up before returning to highway speed, because a low tyre at speed builds heat until it fails. Correct pressures vary with tyre size, load range, construction and how heavily the vehicle is loaded, so start conservative, watch the sidewall bulge, and go lower only as you learn your own vehicle.
Two practical notes. Air down all four tyres to the same figure rather than guessing per corner, and remember that a heavily loaded overland vehicle carries more weight over the rear axle, so the rear tyres tolerate a slightly higher figure than the front. And air down before you are stuck. Airing down a vehicle that is already buried in sand often works anyway, which is why it is the first thing to try before anyone reaches for a rope.
Why are traction boards the first hardware to buy?
Because they change what a solo recovery looks like. Every other force-applying tool in the category needs a second vehicle or an anchor. Boards need only the vehicle you are already driving. You dig the sand or snow away ahead of the driven wheels, wedge a board under the tread at a shallow angle, and drive out at low throttle in the highest gear that will pull.
The MAXTRAX MKII at $267.08 is the reference product and the one everything else is compared against. What separates good boards from bad ones is whether the teeth grip the tread or shear off on the first attempt, and whether the board flexes into the ground rather than snapping across the middle. Cheap boards fail in exactly those two ways, usually on the attempt that mattered. Boards are also the item most likely to be stolen off a rack, so mount them where they can be locked.
Two habits make boards work far better. Reduce tyre pressure first, so the tread can conform to the board surface, and use minimum throttle. Spinning a tyre on a traction board polishes the teeth flat and melts the surface. The recovery that works is the boring one.
Which strap or rope should you buy, and how do you rate it?
A snatch strap is nylon webbing that stretches under load, typically around 20 percent, then returns, converting a second vehicle's momentum into a progressive pull rather than a jerk. A kinetic rope does the same thing with braided rope and more stretch. Both are recovery devices. Neither is a tow strap, and a flat polyester tow strap with almost no stretch must never be used for a snatch recovery, because with nothing to absorb the energy the whole shock lands on the attachment points.
The ARB705LB snatch strap at $74.95 states a 17,600 lb rating and a tested 20 percent stretch under NATA approval, which means the elongation figure is measured rather than claimed. That documentation is most of what you are paying for. The VEVOR 7/8 in kinetic rope at $50.90 states 30,580 lb and is the cheapest honest entry into the category.
Now the counter-intuitive part: match the rating to your vehicle weight rather than buying the biggest number available. The usual guidance is a minimum breaking strength somewhere around two to three times the vehicle gross weight. A strap or rope that is far stronger than that stretches less at the loads your vehicle can generate, which makes the recovery harsher, and it transfers more of the shock into the recovery points and the chassis instead of absorbing it. Oversizing does not add margin. It moves the weakest link somewhere you cannot inspect.
Retire any rope or strap with cuts, abrasion through the outer sheath, glazing from heat, or stitching that has pulled. There is no service life you can read off a tag, so inspect every time it comes out of the bag, and never knot two straps together to make a longer one.
What is the safe way to connect a recovery?
This section is the reason to read the page. Recovery injuries almost never come from a rope that was too weak. They come from what the rope was attached to.
A recovery point is not a tow ball. Attaching a snatch strap or kinetic rope to a tow ball is the single most common cause of serious recovery injuries. A ball and its mount are engineered for a steady, largely downward trailer load, not for a shock load pulling along the vehicle axis. When one shears, several pounds of steel leave at speed and travel far enough to go through a windscreen or a person. There is no correct way to do it and no rating that makes it acceptable.
A rated recovery point is a purpose-made attachment bolted through the chassis or frame with published load figures. A tie-down loop is not one. Factory tie-downs, transport hooks and small brackets on the underside of a bumper exist to hold a vehicle onto a truck or a ship, which is a low, steady, downward load in a known direction. They are frequently spot welded to sheet metal or bolted through thin brackets, they carry no published recovery rating, and they pull out. If you cannot find a published figure for a point, treat it as unrated.
Never put a kinetic rope or snatch strap on a steel tow hook with an open throat. An open hook has nothing to stop the loop jumping out of it as the line goes slack and reloads, which happens on almost every recovery. Use a closed connection: a soft shackle threaded through a rated point, or a bow shackle with the pin done up and then backed off half a turn so it can still be undone after the load has been on it.
Prefer soft shackles. A soft shackle is a loop of braided synthetic rope with a button closure, weighing a few ounces, with ratings that meet or exceed a comparable steel bow shackle. The safety argument is momentum. A steel bow shackle carries two to three pounds of mass, and if a component in the line fails, that mass is launched with all of the stored energy behind it. A soft shackle in the same failure falls to the ground. Soft shackles also cannot damage a body panel, and they can be threaded through a recovery point too small for a pin. Keep them out of contact with sharp edges and hot exhausts, which is the one thing steel handles better.
Use a damper. A damper blanket is a weighted cover laid over the middle of the line, and its job is to absorb energy and drive a failed line down into the ground rather than letting it whip. It costs very little, weighs 2 to 4 lb, and it is the cheapest genuine safety item in the vehicle. Use one on every strap, rope and winch line pull without exception.
Keep everyone out of the line of pull. Draw an imaginary line through the rope and extend it well past both vehicles. Nobody stands in it, nobody photographs from it, and nobody stands within roughly one and a half times the line length to either side of the attachment points. Everyone not driving stands well off to the side, behind cover if there is any. Windows up in both vehicles, and one person in charge of calling the pull so the two drivers are not guessing.
Do you need a compressor, and how big?
If you air down, you need an air source. That is not optional, because driving home at 18 psi is how people destroy a set of tyres and occasionally a wheel. What is very much optional is how fast the compressor works.
The ARB CKBLTP12 twin motor compressor at $1,379.95 is the fastest realistic answer, turning a twenty minute job into about five, and it can also run air lockers and air tools. It draws serious current, so it wants a properly fused circuit sized to its published draw rather than a cigarette socket, and the wiring and fusing guide covers how that connection is made. A single motor portable unit at a fraction of the price will inflate the same four tyres, slowly, while you have a coffee.
When does a winch make sense?
When you drive alone in terrain where a stuck vehicle cannot be dug or driven out, and when the front of the vehicle can take the load. Rate the winch at roughly 1.5 times gross vehicle weight, which puts most mid-size 4x4s at 9,500 lb. Use the loaded weight you actually travel at, not the curb weight from the brochure, because an overland build adds several hundred pounds.
The Smittybilt XRC Gen 2 9,500 lb winch at $329.78 is the honest entry point, and the price is deceptive in one important way: the winch is the cheap half. A bumper engineered and rated to take a winch load is often the larger expense, and it brings its own weight, its own effect on approach angle and its own effect on the front axle load. Bolting a winch to an unrated bumper is worse than having no winch, because it fails under exactly the load you bought it for.
Two notes on line. Steel cable stores more energy than synthetic rope of the same rating and it is the reason winch line failures are dangerous, so a damper matters even more here. Synthetic line is lighter, safer when it parts and easier to handle, but it abrades and needs a fairlead designed for it. Either way, rig to a tree with a wide trunk protector strap rather than wrapping the line around the trunk, and use a snatch block to double the line and halve the load on a hard pull.
How much payload does a recovery kit use?
More than people expect, and some of it lands in the worst possible place. A recovery kit is heavy, dense, and traditionally mounted either on the roof or hanging off the front bumper, which are the two locations that do the most damage to how a vehicle handles.
| Item | Weight, lb | Where it usually lives |
|---|---|---|
| Traction boards, pair | 15 to 20 | Roof or rack, so it counts against dynamic roof load |
| Kinetic rope, 7/8 in x 30 ft | 10 to 15 | Inside, low, in a bag |
| Snatch strap, 30 ft | 8 to 12 | Inside, low, in a bag |
| Soft shackles, pair | Under 2 | Inside, with the rope |
| Steel bow shackles, pair | 4 to 6 | Inside, low, never loose in the cabin |
| Damper blanket | 2 to 4 | With the rope, because it is useless anywhere else |
| Portable compressor, single motor | 8 to 15 | Inside or under a seat |
| Twin motor compressor | 25 to 35 | Mounted, often in an engine bay or a drawer |
| Winch, 9,500 lb | 65 to 90 | Front bumper, ahead of the front axle |
| Winch-capable steel bumper | Roughly 100 and up | Front bumper, ahead of the front axle |
| Jack, shovel and tool roll | 30 to 55 | Inside or on a rear swing-out |
Add the no-winch column and you land around 90 to 110 lb for boards, a rope, shackles, a damper, a small compressor, a jack, a shovel and a tool roll. That is the figure the payload weight calculator uses as its default for recovery gear and tools, and on a mid-size truck with 1,120 lb of payload it is roughly 8 percent of the budget. Now add a 9,500 lb winch at 80 lb, a rated steel bumper at around 100 lb and a twin motor compressor at 30 lb, and the same kit is close to 300 lb, or more than a quarter of the entire payload. Nothing else on the build sheet triples that easily.
The traction boards deserve their own note, because they are usually mounted flat on a roof rack or a platform, where they do not come out of general payload but out of the much smaller dynamic roof load figure. Dynamic roof load, the amount the roof may carry while the vehicle is moving, is commonly only 150 to 220 lb on a standard vehicle, and a rack plus a rooftop tent frequently uses all of it before the boards arrive. The roof rack load and dynamic capacity guide works through that limit, and the payload and GVWR guide covers how it fits with GVWR and axle ratings. If the roof is already full, boards mount well on a rear swing-out or flat against a bed rack.
How do the six picks compare?
| Item | Category | Tier | Rating or key spec | Price |
|---|---|---|---|---|
| VEVOR 7/8 in x 30 ft kinetic rope | Kinetic recovery rope | Beginner | 30,580 lb stated MBS | $50.90 |
| ARB705LB snatch strap, 30 ft | Snatch strap | Beginner | 17,600 lb, 20% stretch | $74.95 |
| ARB510 E-Z digital deflator | Tyre deflator and gauge | Intermediate | Not load rated | $82.00 |
| MAXTRAX MKII boards | Traction boards | Intermediate | Not load rated, 15 to 20 lb per pair | $267.08 |
| Smittybilt XRC Gen 2 winch | Winch, steel cable | Expert | 9,500 lb line pull | $329.78 |
| ARB CKBLTP12 twin compressor | Air compressor | Expert | Twin brushless motor | $1,379.95 |
Ratings are the manufacturers' published figures. Note how little the price column tells you about usefulness: the two cheapest items are the ones that need a second vehicle to be worth anything, the third cheapest is the one that prevents the most recoveries, and the most expensive item on the list solves a problem of patience. Prices move, so confirm before ordering.
Who should not buy the expert tier?
Almost everyone, and the ARB CKBLTP12 twin motor compressor at $1,379.95 is the clearest example in the whole category. It solves in five minutes what a $60 single motor compressor solves in twenty. That is the entire difference. If you air down twice a year, you are paying more than $1,300 to avoid standing around for a quarter of an hour, twice. The people for whom it genuinely makes sense are running a group where one compressor inflates six vehicles, or feeding air lockers and air tools, or airing down and back up every single day of a long trip. If none of that is you, buy the cheap compressor and put the difference into tyres, which do more for capability than anything else on this page.
Do not buy the Smittybilt XRC Gen 2 winch at $329.78 if your bumper is not rated for a winch. The winch is affordable; the rated bumper, the wiring, the fusing and the 180 lb or more of combined weight ahead of the front axle are not. Do not buy a winch at all if you mostly travel with other vehicles, because a rope and a second truck is faster, cheaper, lighter and safer than the pull you were going to do anyway.
And do not buy any of it before the boring items. Recovery gear does not compensate for road tyres, a vehicle loaded over its payload, or driving into something you had no plan for getting out of. The gear that gets used least is the sign of the best trip planning, and the honest order of spending is tyres, then air, then boards, then everything else.
What do people get wrong about recovery gear?
- Buying force before traction. A rope is the cheap item on the shelf and the one least likely to help a solo vehicle. Air down and carry boards first.
- Trusting factory tie-down loops. They are transport hooks. If there is no published recovery rating, treat the point as unrated and find another one.
- Using a tow ball. There is no version of this that is acceptable, and it is the leading cause of serious recovery injury.
- Open hooks on a kinetic line. The loop jumps out as the rope goes slack and reloads. Use a soft shackle or a closed bow shackle.
- No damper, and spectators everywhere. A blanket over the line and everyone well clear of the line of pull costs nothing and changes the outcome of a failure entirely.
- Oversizing the rope. A rope far stronger than the vehicle stretches less, hits harder and moves the weakest link into the chassis. Match the rating to vehicle weight.
- Forgetting to air back up. A tyre at 18 psi builds heat at highway speed until it fails. The compressor is part of the recovery kit, not an accessory to it.
- Ignoring where the weight sits. Boards on the roof and a winch ahead of the front axle both change the way the vehicle drives well before they change what it weighs.
Check your own vehicle and your own jurisdiction. Payload, GVWR, axle ratings, roof load limits, recovery point ratings and the road legality of items such as bumpers, light bars and protruding accessories all vary by vehicle, model year, trim and jurisdiction. Everything here is researched guidance drawn from published manufacturer specifications, standards documents and verified owner reviews. It is not an engineering sign-off and it is not a legal opinion. Read the sticker on your driver door jamb and your owner manual, confirm every load rating with the component manufacturer, and get any doubt about a mounting point answered by someone qualified to sign off on it before you put a load through it.
Where to go next
- Payload weight calculator, to see what the kit costs you in pounds
- Payload and GVWR guide, the long form version
- Roof rack load and dynamic capacity guide, for the limit the boards land on
- Best rooftop tents, the other big consumer of roof load
- Best 12V lights, because most recoveries happen after dark
- Expert overland power setup, the system a compressor and a winch draw from
Frequently asked questions
What recovery gear should I buy first?
A tyre deflator and a way to air back up, because airing down is free traction and it prevents more recoveries than any hardware fixes. After that, traction boards, because they are the only item that gets you out on your own. A rated strap or kinetic rope only helps if there is a second vehicle to pull with, so buy it when you actually travel with other people rather than because it is cheap.
Can I attach a recovery strap to my tow ball?
No. Never. A tow ball is designed for a steady downward and forward load, not a shock load along the vehicle axis, and a ball that shears off under a kinetic recovery becomes a projectile weighing several pounds travelling fast enough to go through a windscreen. This is the single most common cause of serious recovery injuries. Use a rated recovery point bolted to the chassis, or a shackle mount that pins through the receiver.
What is the difference between a snatch strap and a kinetic rope?
Both store energy and release it, so the recovery is a progressive pull instead of a jerk. A snatch strap is webbing with roughly 20 percent stretch. A kinetic rope is braided nylon with more stretch, typically around 30 percent, which makes it gentler on both vehicles and better at recovering a deeply stuck one. Ropes also shed mud and coil more easily. Neither is a tow strap, and neither should ever be used with a hook that has an open throat.
How big a winch do I need?
Rate the winch at roughly 1.5 times your vehicle gross weight, which puts most mid-size 4x4s at 9,500 lb. Weight is what matters, not engine size or tyre diameter, and it should be the loaded weight you actually travel at rather than the curb figure. The winch is also only half the purchase: it needs a bumper engineered and rated to take the load, and that bumper is frequently the larger expense of the two.
Are soft shackles safer than steel shackles?
They carry less lethal energy if something fails. A soft shackle is braided synthetic rope, so it weighs a few ounces and has very little momentum to give up. A steel bow shackle weighs two to three pounds and stores that mass as kinetic energy under load. Both should be correctly rated and correctly used, but if a component is going to let go, the one that weighs almost nothing is the one you want in the line.
How much payload does a recovery kit use up?
A sensible no-winch kit of boards, a rope, shackles, a small compressor, a jack and tools runs about 90 to 110 lb, which is the figure the payload calculator uses. Add a 9,500 lb winch and a rated steel bumper and it roughly triples to around 300 lb, or over a quarter of the payload on a mid-size 4x4. The boards usually live on the roof, where they count against dynamic roof load rather than general payload.
How we choose: we compare published manufacturer specifications, standards documents including ABYC E-11, and verified owner reviews. We do not test gear in person. Vehicle payload, roof load and charging limits vary by model and year, so confirm yours against the door jamb sticker and the owner's manual rather than any number published here.
Totalling your own build weight against your payload? The Overland Build & Power Planner is the paid version of these pages: 8 printable worksheets you fill in with your own numbers, plus the full PDF, $29.